The free version of Gemini limits the number of files uploaded at one time to 10. Some of my newspaper clippings are rather large - as big as 2.2Mb. I decided to use PDF Studio 2024 to optimize all of my clippings before using Gemini so that I could upload and process more files at one time. PDF Studio 2024 usually cuts the size down by at least 1/3 and sometimes more. Use the “Balanced” option - not the “Aggressive” option. Gemini can’t process files optimized with the Aggressive option.
Do you process the clippings within DEVONthink? Or do you use the Gemini.app?
cgrunenberg:
I import the clippings into DT, export them to Finder, process them there with Gemini and then copy and paste the Gemini transcription into the Annotation box for each file. I’m not positive - haven’t checked it thoroughly - but I’m pretty sure that Gemini has to have an OCR layer to work with. DT does that for me when I import the clippings. So it is a package deal. I’ve found, though, that a different process is needed when working with screenshots of text files, which are png, not pdf, files. For some reason, DT insists on making an Annotation file for them on import. They do not look at all like a product of ABBYY, so I don’t know how DT creates them. I do know, though, that they have to be trashed and deleted because they create all kinds of havoc in the Annotation database if not “exterminated”!
Recent models with vision support are usually able to process & analyze images on their own. Even a local model like Gemma 4 should be able to do this.
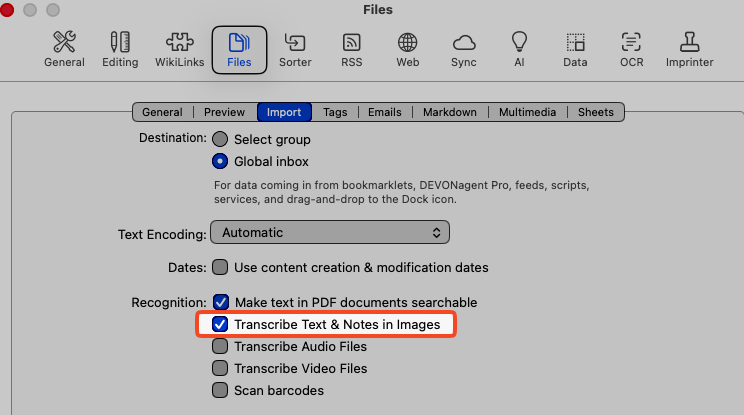
Did you enable transcription for images in Settings > Files > Import and use annotations as the destination, see Settings > AI > Transcription?

Here is a screenshot to give an example of what DT does with png images:
![]()
This is the Global Inbox immediately after dropping the file into it from the Finder:
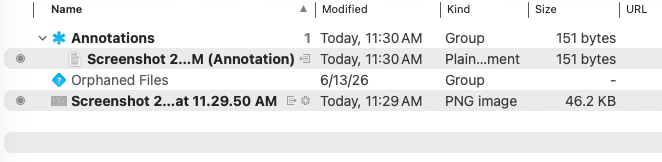
As you can see, there is an annotation file and the file. I didn’t ask for an annotation file to be created and this does not happen when I drop pdf files into the Global Inbox - only with png images.
Here is what that annotation file looks like:
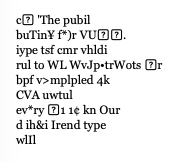
I haven’t done a stare and compare, but I doubt that this is the output of ABBYY.
cgrunenberg:
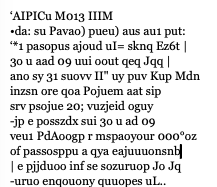
Here is the output by ABBYY from the file I included in the previous reply. Note that it bears no resemblance to the file automatically created by DT upon importing the png file.
As info, when I converted the png to pdf+text, the image turned upside down. I had to export it, turn it right side up with Preview and then re-import it.
Yes, you did:

You might get better results using a different option than Fast Apple Vision text recognition.
2 Likes
troejgaard:
Wow!!! If it weren’t for the wonderful support from gurus like yourself, I would have given up on DT months ago. Switching to “Accurate Apple Vision text recognition” is remarkably accurate and an enormous improvement over “Fast Apple Vision text recognition.”
The annotation file created is plain text. I created this Smart Rule to run On Demand but I’ve made a mistake in the second command because it doesn’t work. What option should I select to tell DT to convert the plain text annotation to rich text?
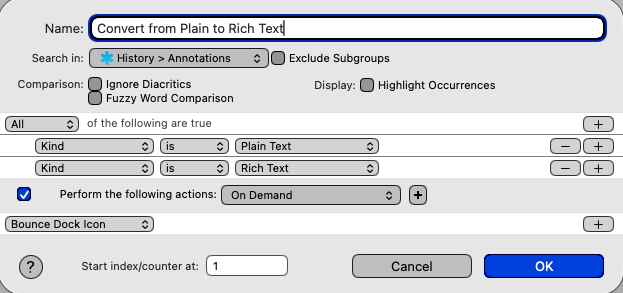
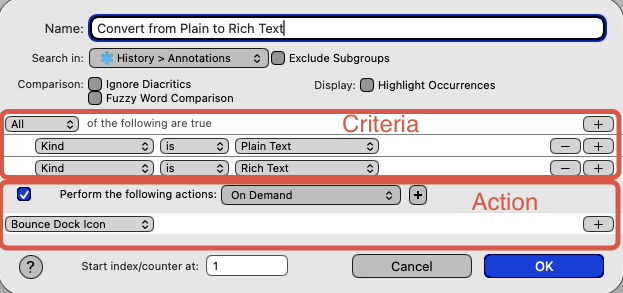
You’ve defined logically impossible criteria (you can’t have a file type that is both plain text AND rich text), and set no action for the smart rule to undertake other than bouncing the dock icon.
3 Likes
What app do you use to do the cool greyed out background so the box focuses where you need it? This would be very handy for work!
MsLogica:
As you can tell, I’m not good with Smart Rules. Thank you for pointing out the error.
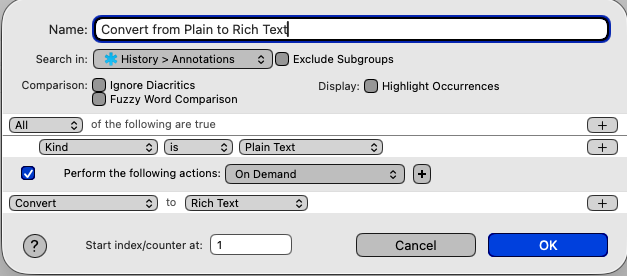
How about this:
MsLogica:
No app involved - this is apparently the default behavior of DT.
troejgaard:
Accurate Apple Vision is a lot better than Fast Apple Vision but it is only marginally better than OCR. Gemini beats all of them, hands down. Gemini has its quirks, which I’m pretty familiar with now, but it gives me the results I need. I’ll continue to use it to create the annotation files.
Actually, this is not a behavior of DEVONthink at all. It’s a visual artifact of you enabling System Settings > Accessibility > Display > Reduce Transparency.

Bluefrog:
You had me there for a while, until I realized you were referring to the MacOS Settings, not DT Settings. I upgraded to Tahoe 26.5 a few weeks ago and didn’t touch anything. In System Settings >Accessibility>Display, Increase contrast and Reduce transparency are linked. If you turn Increase contrast off, Reduce transparency toggles on. I didn’t enable or disable anything - this is apparently the Tahoe default. I don’t have time to play with all of the visual “enhancements” dreamed up by the propeller-heads at Apple. I have work to do!
That’s another condition altogether. If you want to handle files that are either, then use any: any of plain text, rich text
1 Like
I actually meant the app used to “annotate” the image and draw focus to the relevant field/button. My comment wasn’t very clear; my brain is in a puddle in the floor from all the heat.
1 Like
I use a nifty little screenshot app called Shottr. It’s great for quickly marking up images. There are more advanced options out there, but I think it gives you a good selection of annotation tools without being too fiddly.
The “spotlight” tool dims the image outside of selected areas, which can be further highlighted with a colored border.
1 Like
Thank you, the features look so good! It’s an instant buy! To date I’ve just been using Apple’s annotation functions when showing colleagues how to do something, but this will greatly improve things.
1 Like
You’re welcome! Yeah, it’s a big improvement over Apple’s image annotation functions.
1 Like